


When using Win10,some Win10 force enable Secure Boot, the driver will not load properly if it has not been digitally signed by Microsoft WHQL. This is the reason why some win10 users can’t install the MRT driver correctly. How to check if the MRT driver is installed correctly? Move the cursor to Computer, right-click Manage, then click Device Manager to view the IDE ATA/ATAPI controller
Operating procedures: right-click Computer -> Manage -> device manager ->IDE ATA/ATAPI controller
If the Secure Boot is on, MRT driver will not load properly in win10, as shown below:
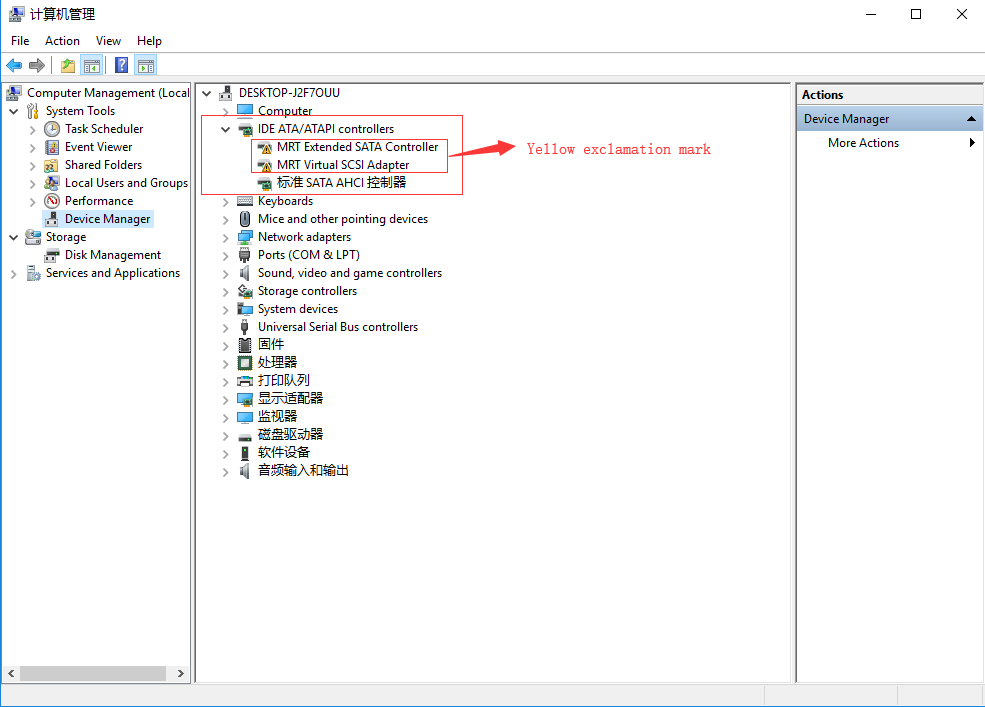
Obviously, a yellow exclamation point is in front of MRT device, indicating that the driver is not properly installed, so MRT application software is undoubtedly impossible to open. Double-click the MRT device icon with an exclamation point, the following dialog will pop up.
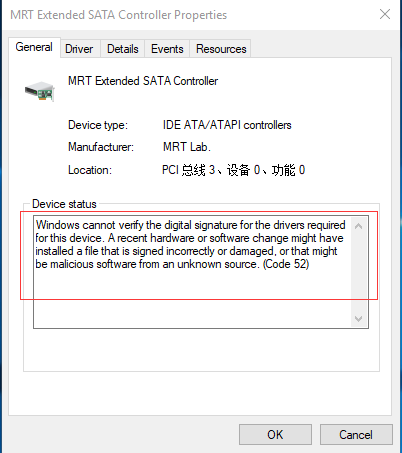
When the device status indicates that MRT driver digital signature cannot be verified, it means the secure boot has been turned on
To solve this problem, you need to turn off the secure boot, and then you can install the MRT driver normally in Win10. The secure boot needs to be turned off in the computer BIOS setting, different computers’ BIOS setting interface is different. Below we briefly introduce some ways of turning off the secure boot in several different BIOS.
Below is the ASUS motherboard. First reboot, enter the BIOS setup interface, click Advanced Mode.
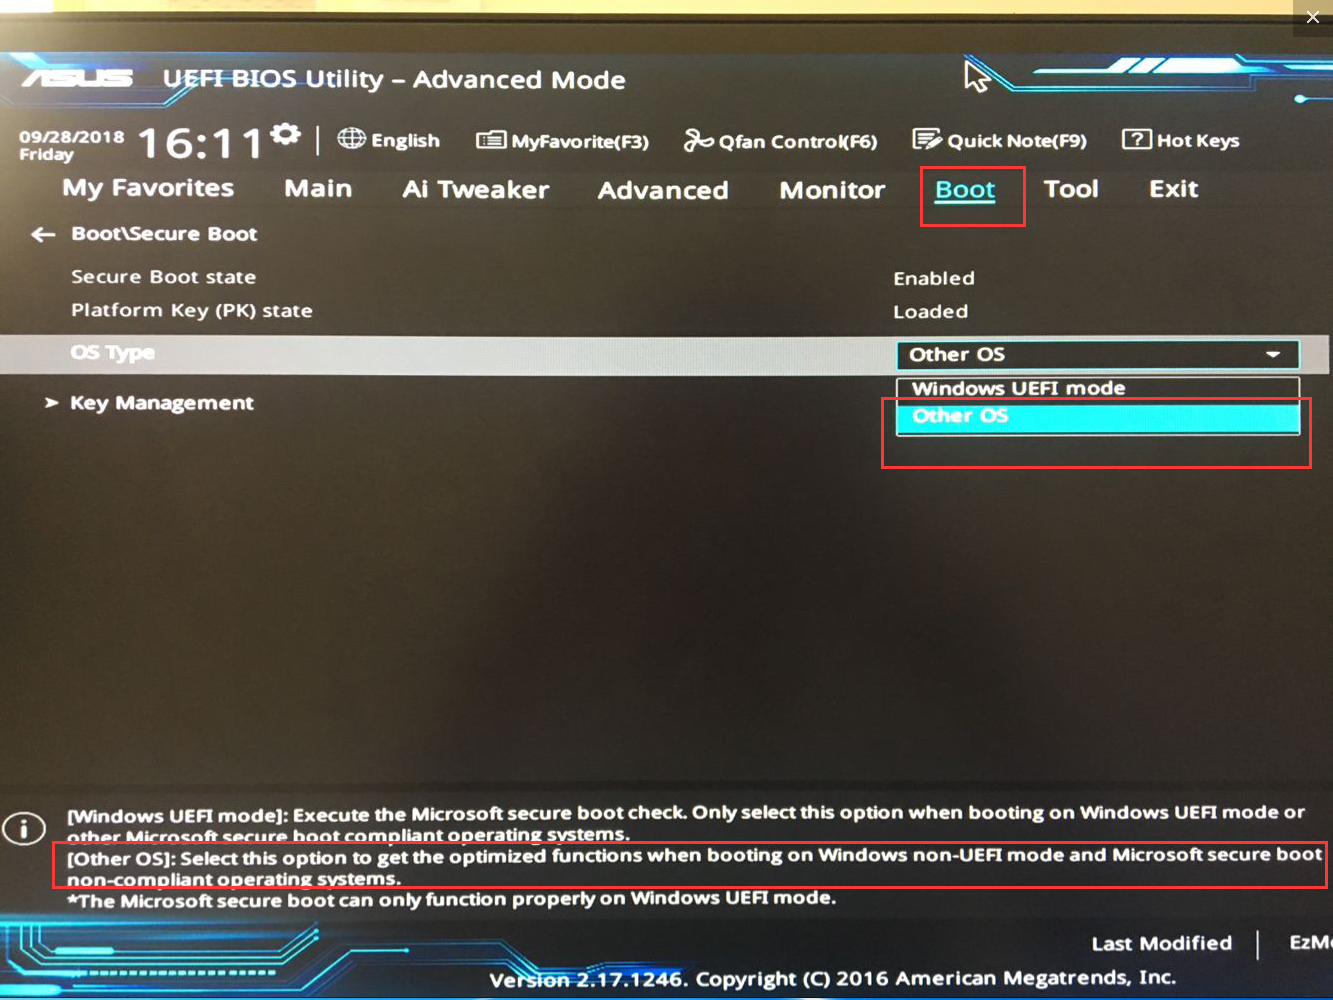
After this interface appears, click “Start” to change the operating system type to other operating systems, so that the secure boot will be permanently closed.
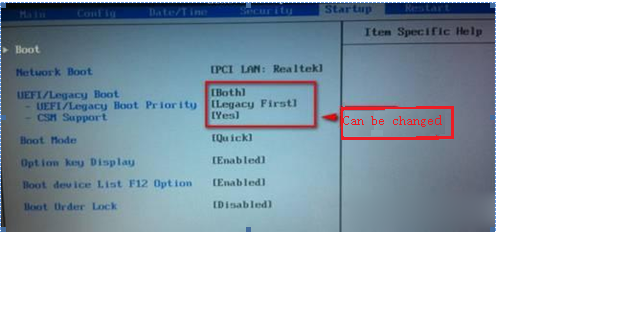
For Gigabyte motherboards, first enter the BIOS interface:

- When the OS Optimized Defaults option under the Restart has been set to Disabled
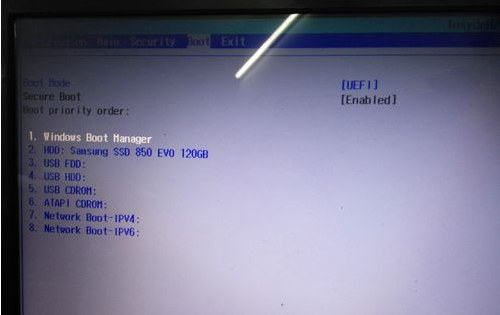
- And the UEFI option under Startup is gray and cannot be changed.
- UEFI option
- We must first restore the BIOS default settings
- After the BIOS default settings, we can see that it can be changed after recovery.
- If it is still gray and can’t be changed, we can enter Security option and find Secure Boot.
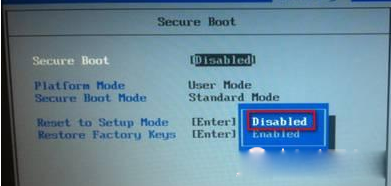
- The last step- turn off UEFI Secure Boot and change Secure Boot to “Disabled”
About Acer Notebook Close Secure Boot:
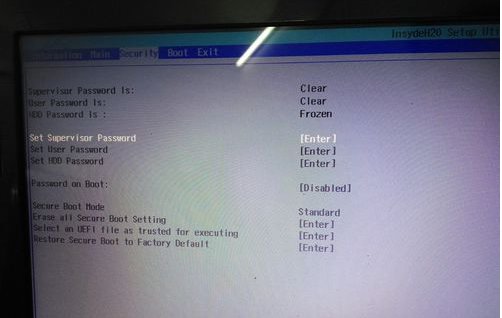
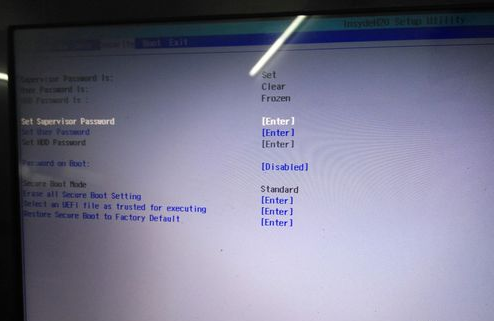
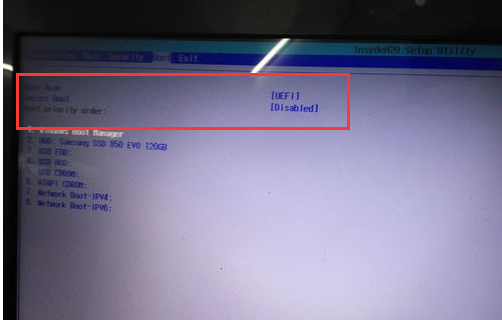
Secure Boot default status is gray and disabled, switch to the next page, select the option to set the password for bios, and set a password for bios. Then go back to the Secure Boot option,now the option has changed to a blue selectable state, then press Enter and finally press F10 to save it.
If it is other models motherboard, you can google the keyword “close the secure boot” to find out how to turn off the safe boot of your motherboard.