


It is through heads that we can read and write data within hard disks. But long time usage or any impact of uncertain factors (such as wobbling the disk when it is running) might damage the heads, and will lead to long time busy or no response status in ATA mode. At that time, disks can not read the stored data in platters along with malfunctions like incompetence of track seeking, knocking and abnormal sounds, or even no run-up.
In our daily data recovery work, it is frequent to encounter cases with regular bad sectors when doing logical scan, with knocking or abnormal sounds after powering on etc., and we will find the real problem of these cases is the physically damaged head. When heads are physically damaged, data recovery softwares can not get access to stored data, and if we want to get those data, we need to open the disk and replace the corresponding damaged parts and heads.
It is not an easy job to replace the heads. Not only need to be serious, careful, patient, but also a good understanding of disks’ internal structure. Frequent disk disassembly to observe and analysis is essential if we want to have a practised head replacement skill. Please noted that, although the working principle of hard disks is nearly the same, but structures are varied with different manufactures. If head parameters between patient and donor are not matched, head replacement can not be done successfully even with top skill. That is to say, a successful head replacement will rely on the suited donor heads to a large extent. So the significance of how to find a suited donor head is self-evident.
In practical head replacement cases, the success rate of Western Digital disks is much higher than what in Seagate disks. Many people feel it is difficult to replace heads of Seagate disks, so in this document, we will focus on the related knowledge concerning to head replacement of Seagate disks, aiming to help all of us to increase the success rate of it.
First of all, let’s discuss how to judge the problem of Seagate disks is caused by physically damaged heads:
1. Manifestations and Sound
Hard disk can not be identified normally, spin up for a while then spin down, obvious knocking and abnormal sounds are typical signs of broken heads.
2. Terminal Commands
Usually, we can not judge whether the problem is caused by broken heads just from manifestations if the heads are not severely damaged, because when the heads are not that broken, the manifestations might not be obvious. So we need to use terminal commands to help determine if the disk can get access to T-level.
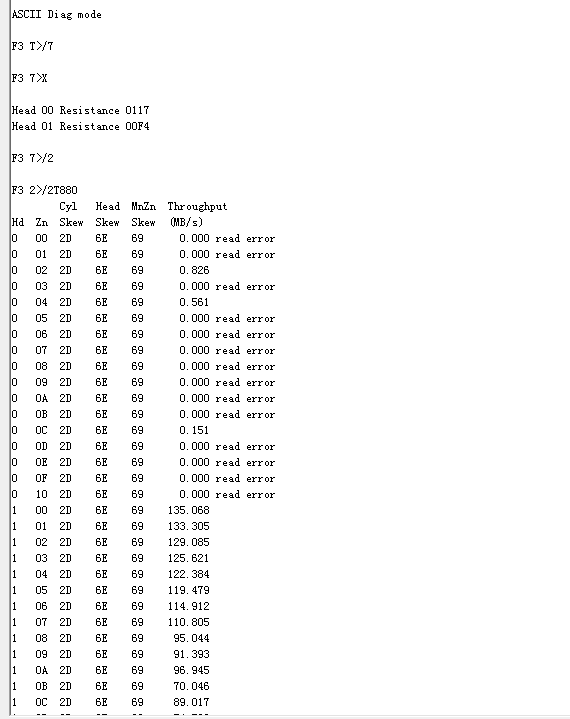
X command under 7 level and 2T880 command under 2 level are commonly used. The first one can be used to test resistance of head; the second one can be used to test throughput capacity of head. These two commands can reflect the performance and status of the head, so to some extent, it can help determine whether the head is physically damaged or not. As shown in the picture:
When we can assure the problem is caused by physically damaged head, then we need to seek for the needed donor heads. If we want to get the needed donor heads, we need to find the matched donor disk first, what are needed parameters when looking for one donor disk?
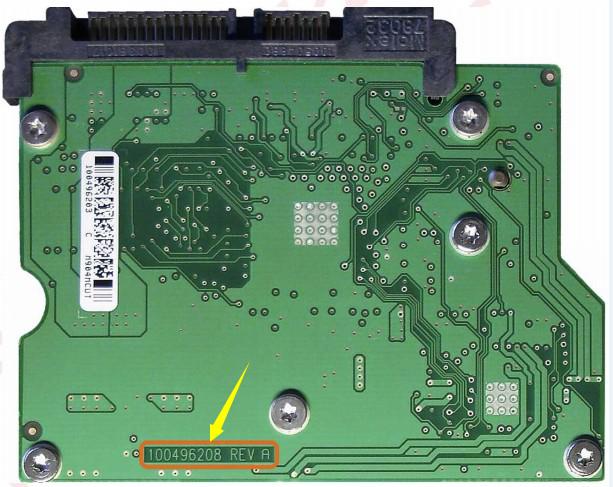
First of all, we need to find the corresponding PCB board, the PCB board number of the donor should be exactly the same with the patient.
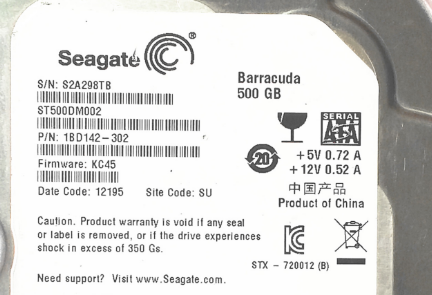
Then we need to pay attention to Model number, SN number, PN number and firmware verison. Model number, PN number and firmware version should be exactly the same and at least first three letters of SN number should be the same. The first letter of SN number refers to manufacturing place, the second refers to platter type, and the third letter refers to the head number.
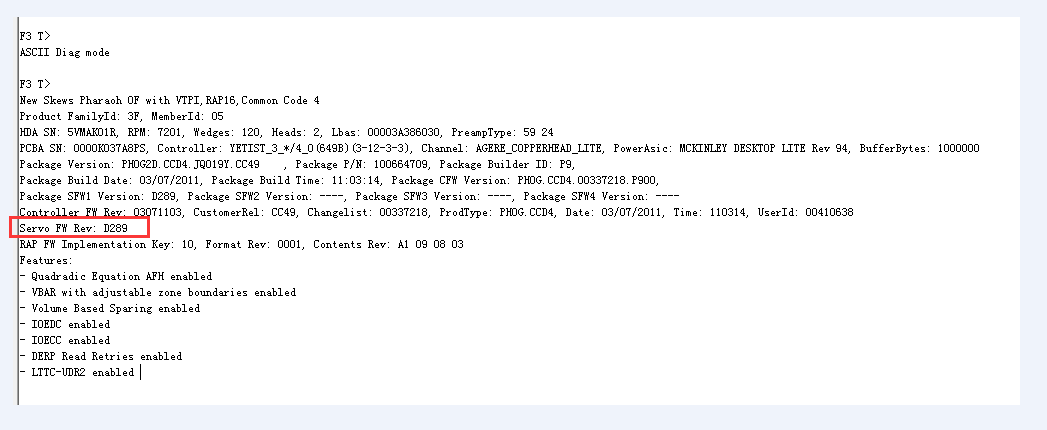
If both patient and donor disks can get access to terminal, it is recommended to check whether servo version keeps the same. In terminal interface, get access to T-level first, then press CTRT+L to check the servo version, as shown in the picture:
Even we find one donor disk which accords with all the needed parameters, it still can not guarantee a 100% successful head replacement. For Seagate generation 11 and 12, listening is needed. Listening specifically refers to one advanced check to which before we replace heads, we put the PCB board from patient to donor, power on it and listen sound. The purpose is to test whether the PCB board from patient can motivate the donor heads or not. If we can listen the sounds of track seeking and heads moving first and then the sound of knocking after powering on, then this donor is usable; But if there is no track seeking sound, and we can hear knocking sound immediately after powering on, then this donor is unusable.
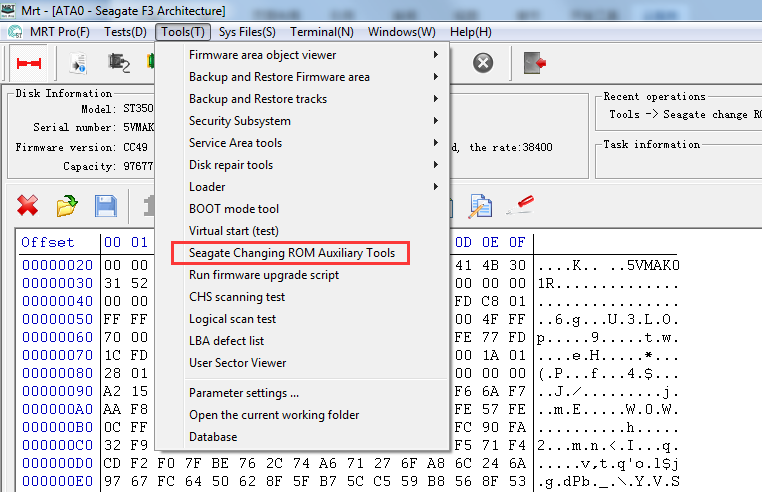
What’s more, if the disk can read after head replacement but poor in performance, we can try to use software to migrate the needed head adaptive parameters so as to increase the reading & writing performance of the head. In MRT software Seagate F3 Architecture, there is one option named “Seagate Changing ROM Auxiliary Tools”,within which there is one special function can adapt parameters of heads. As shown in the pictures:
This function can transplant donor disk’s head adaptive parameters to patient disk’s ROM, aiming to decrease incompatible situations and time consumption of head replacement while increase the success rate of it.
Before using this function, we need to get the ROMs of patient and donor disks. Patient disk needs head replacement usually can not be ready and will keep busy status, so we’d like to recommend to read its ROM out via Bootcode mode. This is the tutorial link of how to read and write ROM via Bootcode mode: http://us.mrtlab.com/tech/seagate/137.html
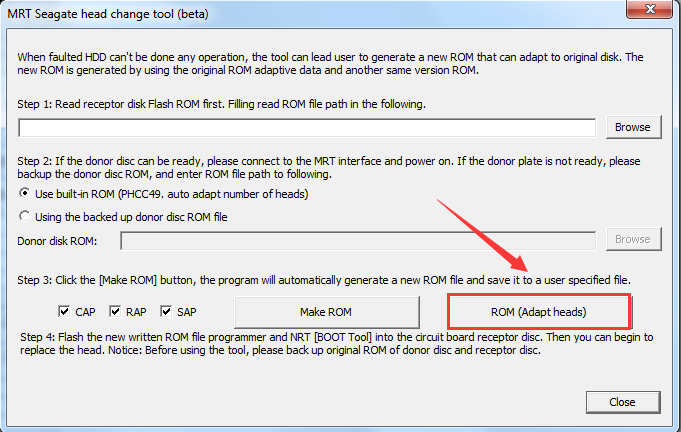
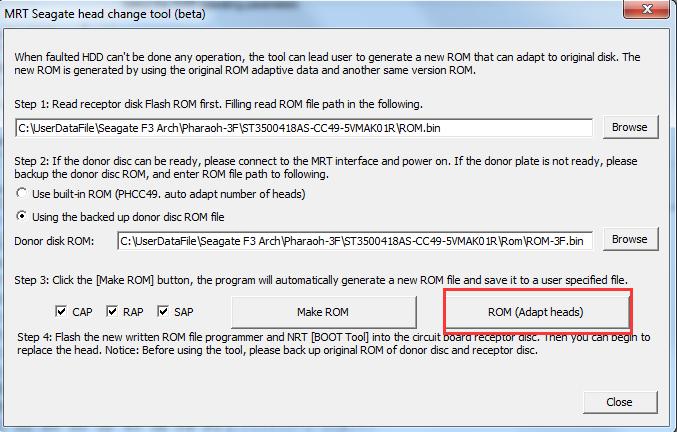
Once we get the ROMs of patient and donor disks, we can use “Seagate Changing ROM Auxiliary Tools”. We import ROM from patient in step 1, then import ROM from donor in step 2, and last click “ROM(Adapt heads)” in step 3, then it will pop up a dialog box to let us save the newly generated ROM, as shown in the picture:

Finally, we use Bootcode mode to write this new ROM to patient disk, and this will greatly improve the success rate of head replacement.
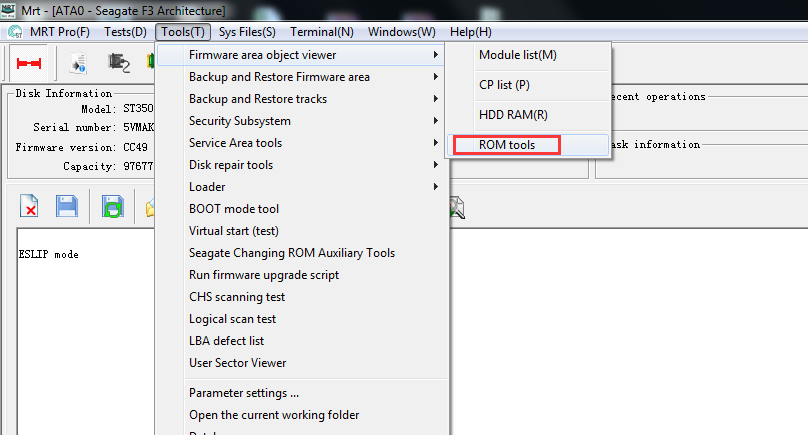
In fact, this function can be done in ROM tools of MRT software:
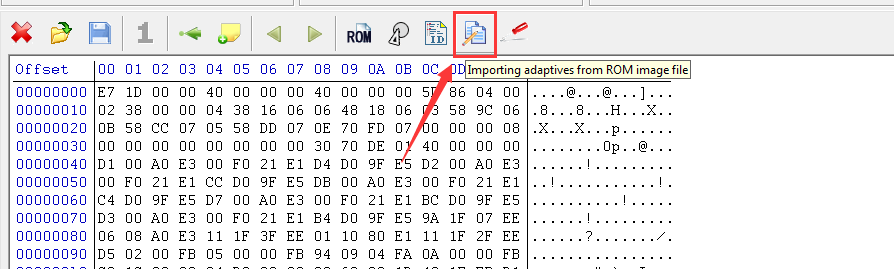
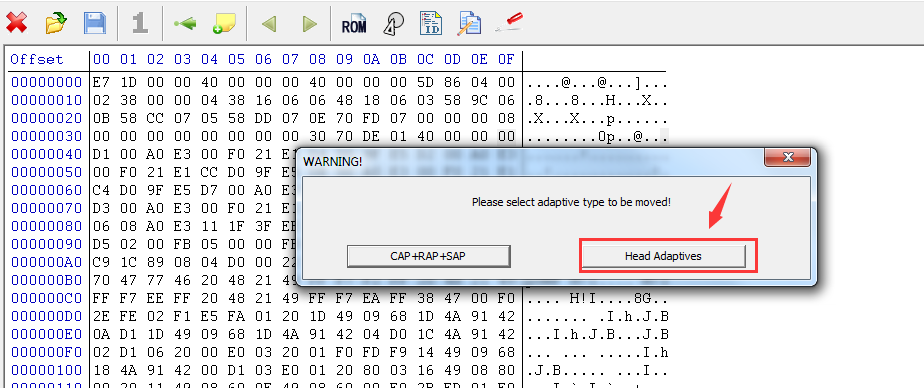
Select “Tools->Firmware area object viewer->ROM tools”, use BootCode mode to read ROM out, then click “Importing adaptives from ROM image file” to import the saved donor ROM, select “Head Adaptives” in the pop-up dialog box, and click “Save” icon to save this newly generated ROM.
In the end, we still use Bootcode mode to write this new ROM to patient disk, and the effect of it is just the same as when we use “Seagate Changing ROM Auxiliary Tools”. Both of them can greatly increase the success rate of head replacement.
The above all are the contents of how to increase the success rate of Seagate disks’ head replacement, thanks for your reading!